 WebIssues Manual
Version 1.1.4
To log into the system using a web browser, simply type the URL of the WebIssues server in the address bar, for example http://www.example.com, and press ENTER. You can add the address of the server as a bookmark in your browser to avoid having to type it each time.
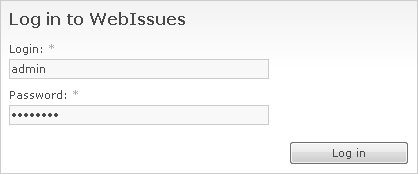
In the login window, type your username and password. If they are correct, you will be redirected to the main window. You may also be asked to enter a new password, if the password was set by the administrator of the system and he forced you to change it. Depending on its settings, your browser may offer to remember passwords.
To log in through the Desktop Client, run it and enter the URL of the server in the address bar, and then press ENTER. When the login window appears, enter your username and password. As with the Web Client, you may be asked to change your password.
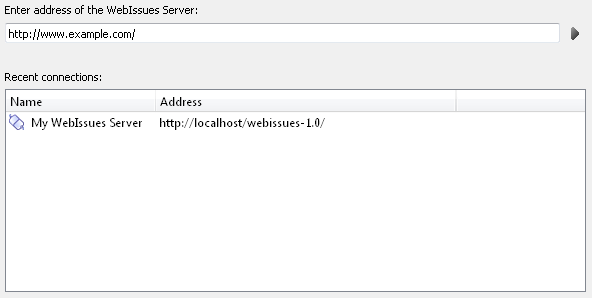
The Desktop Client automatically remembers the addresses of all WebIssues servers it connects to. You can select a server from the list and double-click to connect to it. You can also choose to remember the password to avoid having to enter it each time. If you want to log in as another user, select a server from the list, right click and select Connect as. The program remembers the previously used logins for each server and displays them in the contextual menu.
After logging into the WebIssues system, you can change your password at any time. In the Web Client, click Tools in the upper right corner of the window, and then click Change Password. In the Desktop Client, this command is always available in the main window's toolbar. Enter your old password, and then enter the new password twice and click .
Note
If the WebIssues server is properly configured, you can connect to it using an encrypted HTTPS connection. To do this, type the address in the browser or the Desktop Client, for example https://www.example.com. If the server certificate is invalid, a warning will be displayed. The information that the connection is encrypted is displayed in the lower right corner of the Desktop Client's window, and in the browser it's usually displayed next to the address bar.
On Windows and OS X the Desktop Client automatically detects system proxy settings. However in case of Linux, you must enter the connection parameters if you want to use a proxy. For more information, see the section called “Desktop Client settings”.
If the administrator of the WebIssues server has enabled anonymous access, and you don't have an account in the system, you can use the Anonymous Access command in the login window of the Web Client to access the system without logging in. You will only have read only access to selected projects and you won't be able to add or edit any issues. You will be able to see project descriptions, issues and comments and to download attachments from the public projects. You will also be able to use public views, but you won't be able to create your own views, use alerts or subscribe to issues.
Anonymous access is only available in the Web Client. In order to access the system using the Desktop Client, you need to be a registered user.
Note
For more information about enabling anonymous access, see the section called “Access settings”.
If the WebIssues server administrator has enabled this option, you can register a new account in the system. Depending on the configuration, the approval of the administrator may be necessary to complete registration. To start creating a new account, click the Register New Account link in the login window of the Web Client. If you are using the system in anonymous mode, you can click Register in the upper right corner. Enter the user name that will be visible to all users, usually your first and last name. Then enter your login and password that you will use to log in to the system. Also enter your e-mail address and click .
The specified e-mail address will be verified by sending a message with an activation link. Click the link or copy the address to open it in the browser. You should receive this message shortly after registration. When you activate the registration request, you will be able to log in immediately using the specified login and password, or you will have to wait for administrator's approval. Once your registration request is approved, you will receive a confirmation message and you will be able to log in.
Note
For more information about enabling and configuring user registration, see the section called “Access settings”.