 WebIssues Manual
Version 1.1.4
The Desktop Client allows you to create simple reports containing a list of issues or details of the selected issue. These reports can be directly printed or saved as a PDF or HTML document. In both the Desktop Client and the Web Client you can also export the list of issues to a CSV file, which can be imported into a spreadsheet or an external database.
To create a report based on a list of issues, open the folder or global list of issues, and select the view if you want to filter the issues. Make sure that the list of issues is active by clicking on it, and then select the command to print the report, or to save it in PDF format. To export the list as a document in HTML format or as a CSV file, expand the menu next to the button and select the appropriate option.
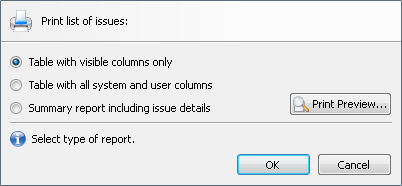
The report can be a simple table, which can contain only columns which are visible in the selected view, or all system columns and user-defined columns (attributes). The report may also have the form of a summary, including the properties and attributes of individual issues. When exporting to CSV format it is only possible create a table report.
If you are saving the report to a file, select the type of the report, press and then select the folder where you want to save the file and enter its name. In case of the Web Client, the report will be simply downloaded by the browser. When printing a report, press and then select the printer and possibly other printing options. You can also press the button to see the report before printing.
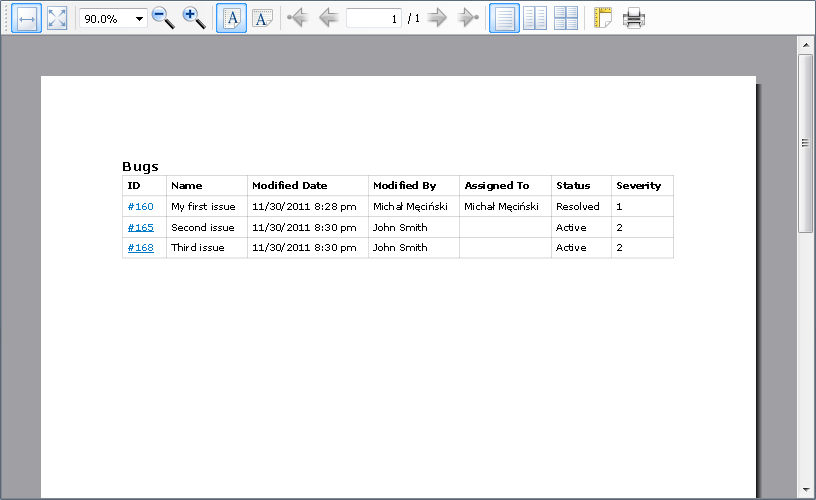
You can zoom the preview in and out and move between pages. The preview window also lets you change the page orientation and other page settings, such as paper size or margins. Press the button to print the report.
Tip
Depending on the regional settings, Excel can sometimes incorrectly read the CSV file, so that all fields are displayed in one column, or misinterpret the character encoding. In this case, use the function of importing a text file, select the UTF-8 encoding and choose comma as the column separator. The same applies to other applications which import CSV files.
To create a report based on a single issue, select the issue and make sure that the issue history view is active by clicking on it. Then select the command to print the report, or to save it in PDF format. You can also export the report as an HTML document by selecting the appropriate option from the dropdown menu.
The report can be a summary that displays only the properties and attributes of the selected issue. It can also be a full report, containing the entire history of the issue. In case of a full report, the filter chosen in the issue history view is taken into account (for example, only comments or only attachments).
Similarly to the list of issues, if you are saving the report as a file, select the type of report, press and then select the folder where you want to save the file and enter its name. When printing the report, press and then select printing options. Before printing, you can also see the .